
파이토치 한국사용자 모임의 글을 보면서 공부한 내용을 정리한 글입니다.
파이토치(Pytorch)는 딥러닝을 위한 오픈 소스 머신러닝 라이브러리로 Meta에서 개발되었다.
유연하고 동적인 그래프 계산을 가능하게 해주는 특징을 가지고 있다.
핵심 기능은 텐서(Tensor)라는 다차원 배열로 이 배열을 통해 다양한 수학적 연산을 수행하고, NN을 구축하고 학습할 수 있다.
파이토치는 자동 미분(Automatic Differentiation)을 지원하며 Grandient를 계산하고 Backpropagation 알고리즘을 통해 모델 학습을 진행한다.
GPU를 지원한다.
텐서(Tensor)
텐서는 배열이나 행렬과 매우 유사한 특수한 자료구조이다.
Pytorch에서는 텐서를 사용하여 모델의 Input, output, 모델의 매개변수들을 부호화(encode) 한다.
텐서는 GPU나 다른 하드웨어 가속기에서 실행할 수 있다는 점만 제외하면 Numpy ndarray와 유사하다.
Tensor와 ndarray는 종종 동일한 내부(underly) 메모리를 공유하기 때문에 데이터를 복사할 필요가 없다.
텐서 생성 방법
1. 데이터로 부터 직접 생성
import numpy as np
import torch

data = [[1,2],[3,4]]
tensor_data = torch.tensor(data)
print(tensor_data)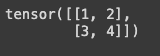
2. Numpy 배열로 부터 생성
# 2. Numpy 배열로 부터 생성

import numpy as np
import torch
shape = (3, 4)
low = 0
high = 1
data = np.random.uniform(low, high, size=shape)
tensor_data = torch.tensor(data)
print(tensor_data)
3. 다른 텐서로부터 생성
# 3. 다른 텐서로부터 생성
one_tensor = torch.ones_like(tensor_data)
print(one_tensor)
random_tensor = torch.rand_like(tensor_data, dtype=torch.float64)
print(random_tensor)
4. 무작위 또는 상수 값을 사용
# 4. 무작위 또는 상수값을 사용
shape = (3,4)
rand_tensor = torch.rand(shape)
one_tensor = torch.ones(shape)
zero_tensor = torch.zeros(shape)
print(rand_tensor)
print(one_tensor)
print(zero_tensor)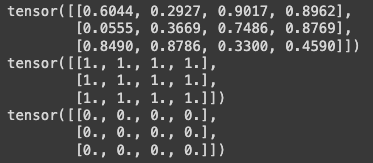
텐서의 속성 : 모양(shape), 자료형(datatype) 및 어느 장치(device)에 저장되는지
tensor = torch.rand(3,4)
print(f"텐서의 모양 : {tensor.shape}")
print(f"텐서의 데이터타입 : {tensor.dtype}")
print(f"텐서가 저장된 장치 : {tensor.device}")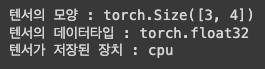
텐서의 연산은 전치, 인덱싱, 슬라이싱, 수학 계산, 선형 대수, 임의 샘플링 등 100가지 이상의 연산이 존재한다.
torch — PyTorch 2.1 documentation
Shortcuts
pytorch.org
각 연산들은 GPU에서 실행할 수 있다. (.to() 메소드를 사용하여 GPU의 가용성을 확인 후 GPU로 텐서를 명시적으로 이동할 수 있음)
tensor = torch.rand(3,4)
print(f"텐서가 저장된 장치 : {tensor.device}")
# GPU가 존재하면 텐서 이동
if torch.cuda.is_available():
    tensor = tensor.to("cuda")
    print(f"텐서가 저장된 장치 : {tensor.device}")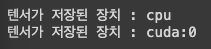
연산 예시1(Indexing and Slicing)
print("-------Indexing and Slicing-------")
print("First row : ",tensor[0])
print("First col : ",tensor[:,0])
print("last col : ",tensor[...,-1])
tensor[:,-1]=0
print("Last col To 0 : ",tensor)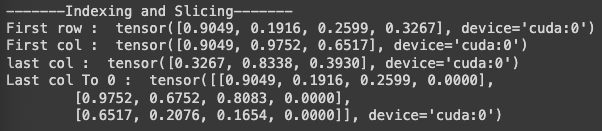
연산 예시2(Cat)
print("-------Cat-------")
t1 = torch.cat([tensor,tensor,tensor])
print("Cat 3 Tensor : ",t1)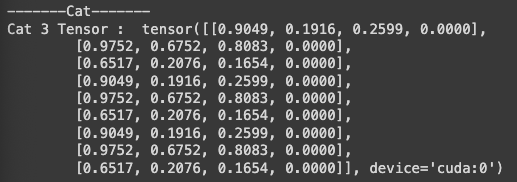
연산 예시3(산술연산)
print("-------Arithmetic Operation-------")
# 행렬 곱
y1 = tensor @ tensor.T
y2 = tensor.matmul(tensor.T)
# y1, y2는 같은 연산
y3 = torch.rand_like(y1)
print("전치 : ",tensor.T)
# out을 사용하면 출력값을 변수에 저장
print("행렬 곱 : ",torch.matmul(y1,y2,out=y3))
# == tensor * tensor
print("요소별 곱 : ",tensor.mul(tensor))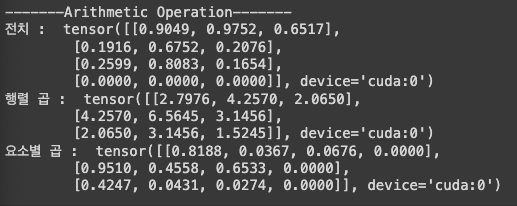
연산 예시4(집계)
print("-------Single Element-------")
# 집계
agg = tensor.sum()
# 요소가 하나인 텐서의 경우 item 메서드로 Python 숫자로 변환 가능
agg_item = agg.item()
print("agg : ",agg)
print("agg_item : ",agg_item)
연산 예시5(Inplace)
print("-------In-place-------")
print(tensor)
# 변수를 직접적으로 변경
print(tensor.add_(5)) # +5
cpt = tensor.copy_(tensor)
print(cpt)
print(tensor.t_()) # 전치
# 메모리를 일부 절약하나 기록이 즉시 삭제되어 도함수 계산에 문제발생 가능성이 있어 사용을 권장하지 않음.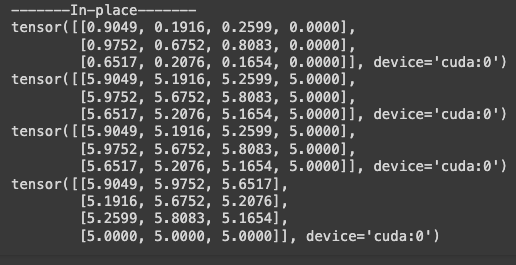
텐서와 넘파이 배열은 CPU 상에 저장시 같은 메모리 공간을 공유하기 때문에 하나를 바꾸면 둘다 반영된다.
t = torch.ones(5)
print("Tensor : ",t)
n = t.numpy()
print("Numpy array : ",n)
# CPU 상의 텐서와 Numpy 배열은 같은 메모리 공간을 공유하기 때문에 변경 사항이 반영됨
t.add_(1) # +1
print("Tensor : ",t)
print("Numpy array : ",n)
# Numpy 배열의 변경사항이 텐서에 반영
np.add(n,1,out=n)
print("Tensor : ",t)
print("Numpy array : ",n)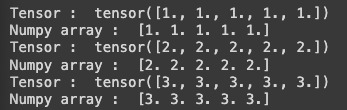
1. tensor.ipynb
Colaboratory notebook
colab.research.google.com
'AI > AI 라이브러리' 카테고리의 다른 글
| [Pytorch] 모델 매개변수 최적화하기 (0) | 2023.12.28 |
|---|---|
| [Pytorch] Autograd (0) | 2023.12.28 |
| [Pytorch] 신경망 모델 구성하기 (0) | 2023.12.27 |
| [Pytorch] 변형(Transform) (0) | 2023.12.27 |
| [Pytorch] 데이터셋 (0) | 2023.12.27 |


