본 포스트는 2024년 Google Study Jam을 공부하면서 개인적으로 내용을 정리한 포스트 입니다.
Task1 . Verify Data in the Source Instance for migration
1. Navigation menu > Compute Engine > VM instances > pg14-source > Connect > SSH로 터미널을 열고 PostgreSQL 클라이언트에 접속한다.
2. 다음 명령어들을 입력하여 테이블을 확인한다.
\dt
select count (*) as countries_row_count from countries;
select count (*) as departments_row_count from departments;
select count (*) as employees_row_count from employees;
select count (*) as jobs_row_count from jobs;
select count (*) as locations_row_count from locations;
select count (*) as regions_row_count from regions;
Task2. Create a Database Migration Service connection profile for a stand-alone PostgreSQL database
1. Navigation menu > Compute Engine > VM instances > pg14-source에서 Internal IP를 복사한다.
(PostgreSQL 소스 인스턴스에 대한 연결 정보)
2. Navigation menu > Database Migration > Connection profiles에서 Create Profile을 클릭
- Database engine : PostgreSQL
- Connection profile name : pg14-source
- Hostname or IP address : 아까 복사한 Internal IP
- Port : 5432
- Username : postgres
- Password : Change3Me
- Region : (나오는 값)
Task3. Create and start a continuous migration job
1. Navigation menu> Database Migration > Migration jobs에서 Create Migration Job을 클릭
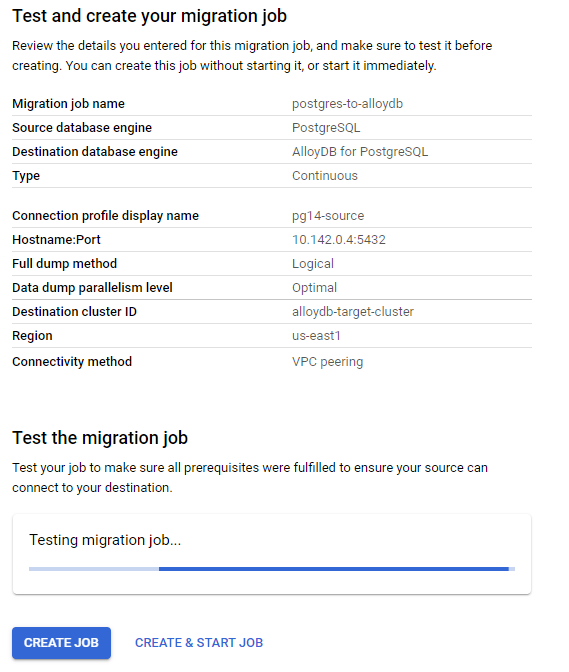
- Migration job name : postgres-to-alloydb
- Source database engine : PostgreSQL
- Destination database engine : AlloyDB for PostgreSQL
- Destination region : (나오는 값)
- Migration job type : Continuous
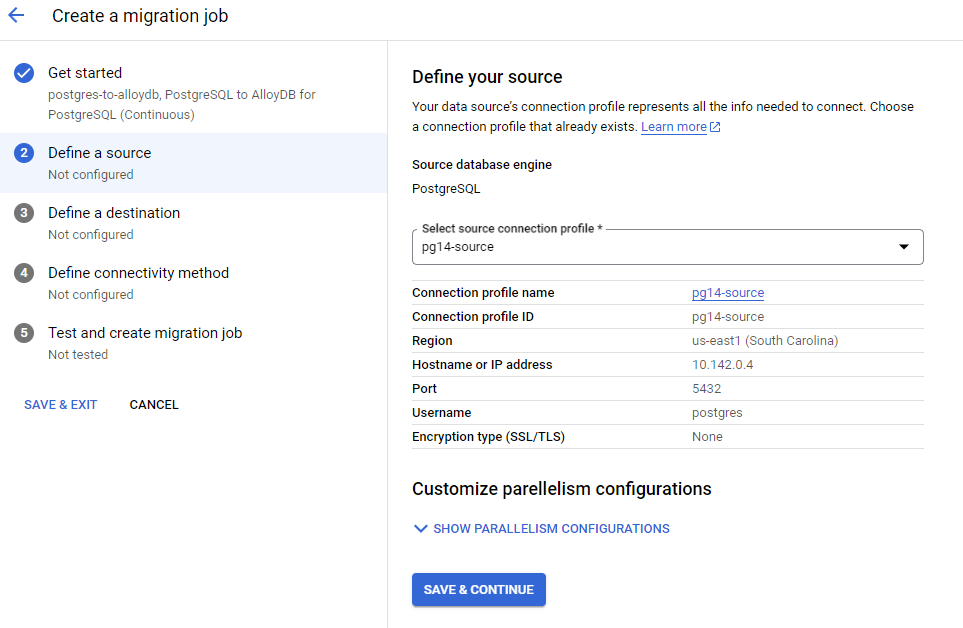
2. Select source connection profile에서 pg14-source connection profile을 선택한다.
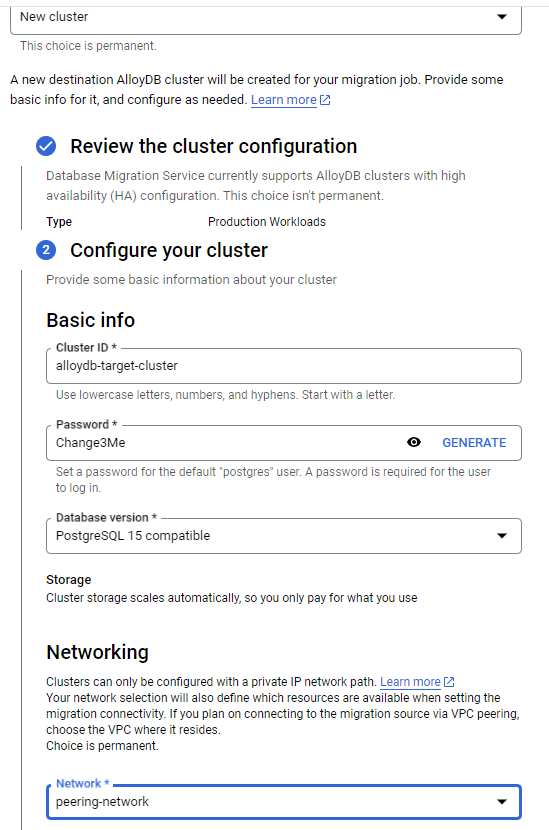
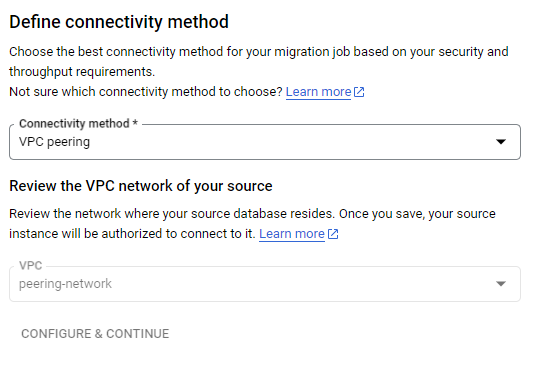
3. DMS 위자드로 AlloyDB 클러스터와 인스턴스를 생성한다.
- Type of destination cluster : New cluster
- Review the cluster configuration : Continue
- Cluster ID : alloydb-target-cluster
- Password : Change3Me
- Network : peering-network
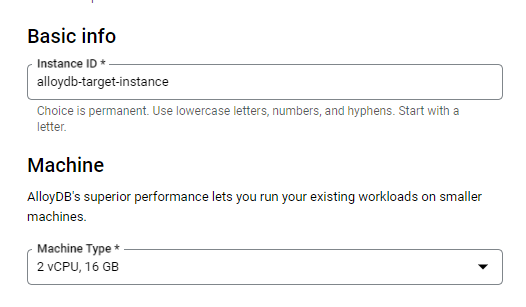
- Instance ID : alloydb-target-instance
- 2 vCPU, 16GB
- Connectivity method : VPC peering
4. 완료되면 Test Job을 클릭한 후 테스트가 끝나면 Create & Start Job을 누른다.
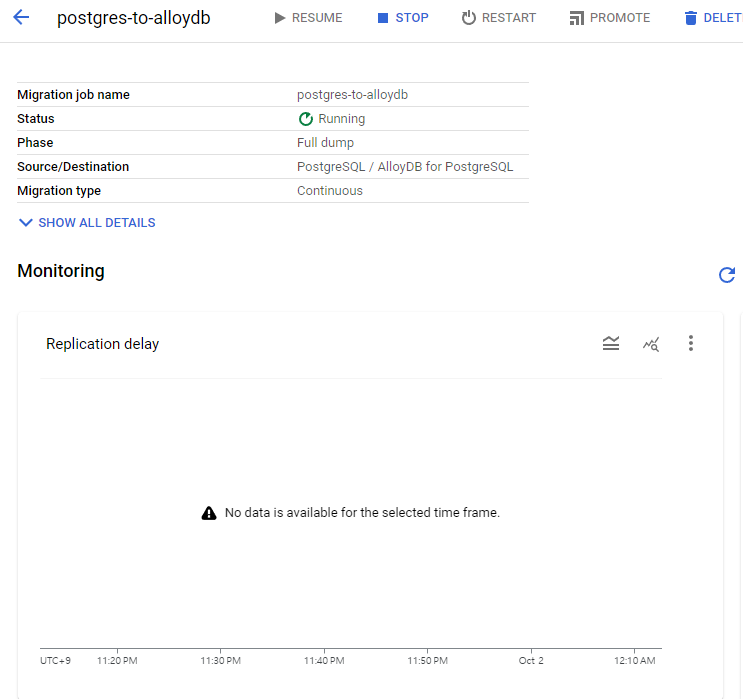
5. Navigation menu > Database > Migration > Migration jobs > postgres-to-alloydb에서 migration job status에 Running가 되면 다음 테스크를 진행한다.
Task4. Confirm data load in the AlloyDB for PostgreSQL Instance
1. Databases > AlloyDB > Clusters > alloydb-target-cluster > alloydb-target-instance에서 instance section의 Private IP를 기억해둔다.

2. Navigation menu > Compute Engine > VM instances > alloydb-client > Connect > SSH로 터미널을 열고 다음을 수행
export ALLOYDB=ALLOYDB_ADDRESS

echo $ALLOYDB  > alloydbip.txt

psql -h $ALLOYDB -U postgres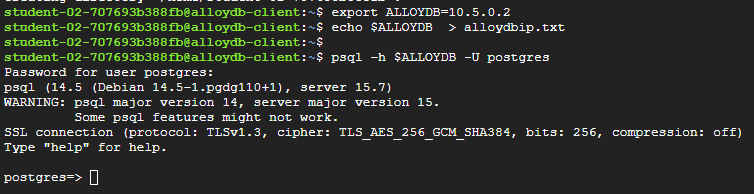
\dt
select count (*) as countries_row_count from countries;
select count (*) as departments_row_count from departments;
select count (*) as employees_row_count from employees;
select count (*) as jobs_row_count from jobs;
select count (*) as locations_row_count from locations;
select count (*) as regions_row_count from regions;
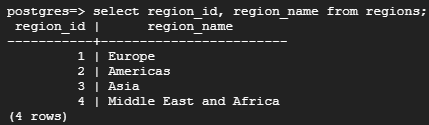
select region_id, region_name from regions;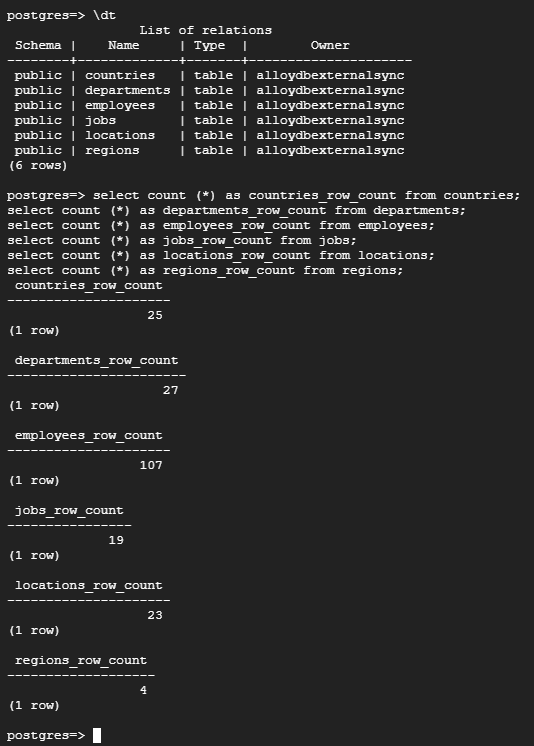
Task5. Propagate a live update to the AlloyDB Instance
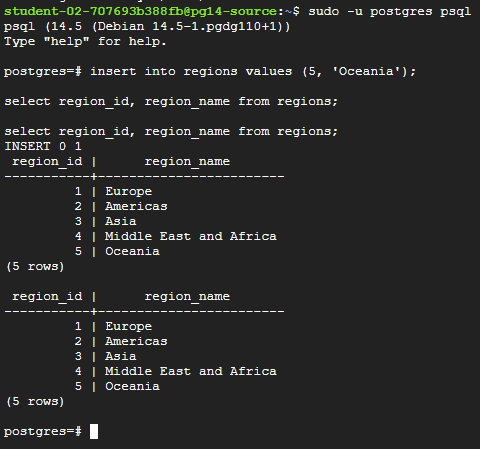
1. Navigation menu < Compute Engine > VM instances > pg14-source > Connect > SSH로 터미널을 열고 다음을 입력한다.
sudo -u postgres psqlinsert into regions values (5, 'Oceania');
select region_id, region_name from regions;
select region_id, region_name from regions;